When to Use Live Action Video
Video is one of the most widely accessible forms of media. It captures audiences by telling a story visually in a way that is easy to understand. Choose this medium if you think your project will benefit from visual representations and hands-on storytelling.
Stages of Production
1. Brainstorm
- Chances are you already have an idea of what you want your project to look like. That's great! Time to put it down on a page and get those creative juices going. At this step in pre-production don't worry about the details. Let your mind explore and start to connect the dots.
2. Write a Script
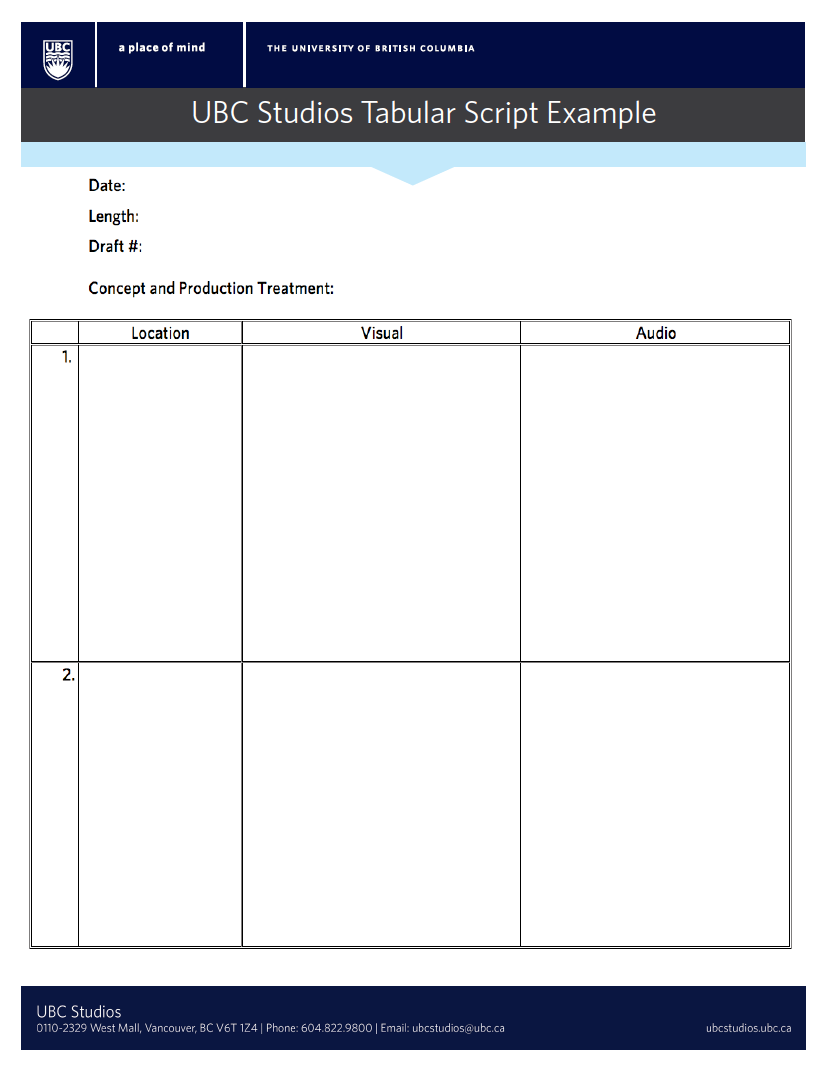
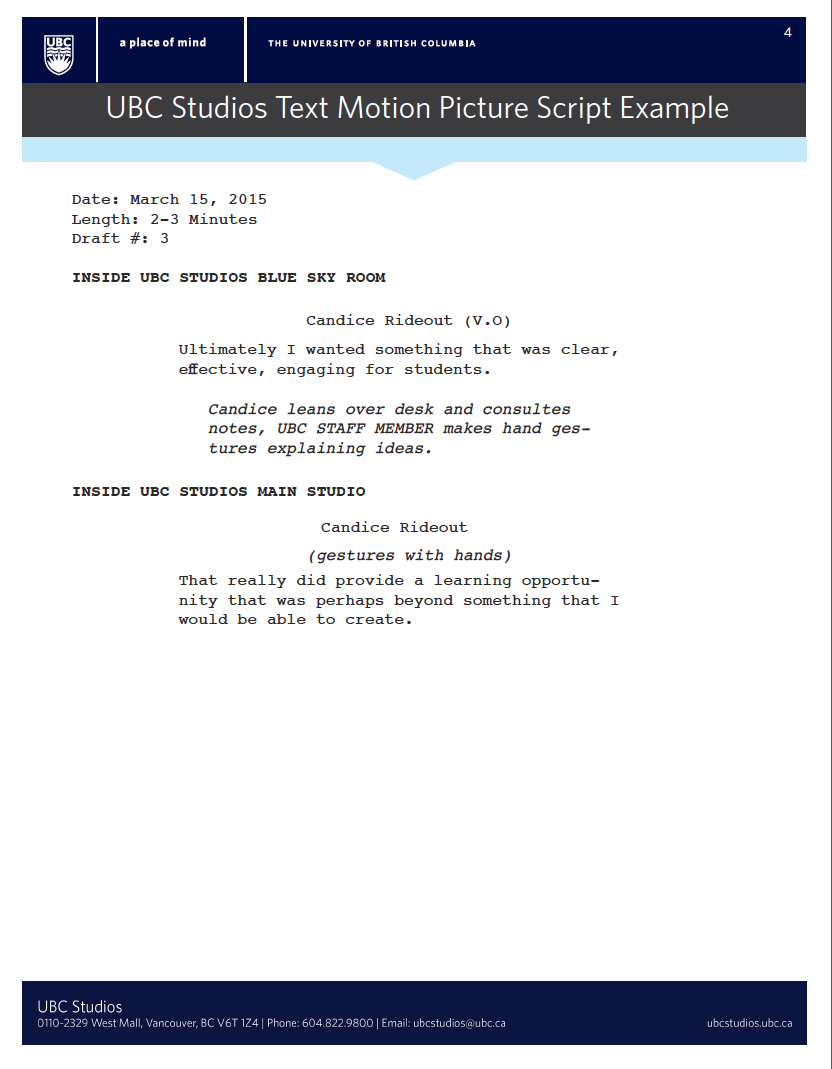
- Now it's time for more specifics. How will you take your ideas from step 1 and convey them to an audience? This may take some time to figure out, so be patient. Write down what you want to be said on screen and directions for your actors. For a detailed script outline click here for a tabular script and here for a text motion picture.
3. Draw a Storyboard
- Draw it out! Storyboards are great tools to visually represent what you want to happen on screen and what shots you need to film. You don't need to make complicated sketches, simple drawings will do. Click here for a Blank storyboard template.
4. Plan
- Budget out the project. Make sure you have a clear outline of how you will budget equipment, talent and any other production costs.
- Pick a date and location and make sure you fill out any necessary release forms.
- Create a film schedule. Clearly write down when you will be filming what so on shoot day there will be no confusion.
- Assemble your team. Book talent and crew for your project. Debrief with them and give clear instructions.
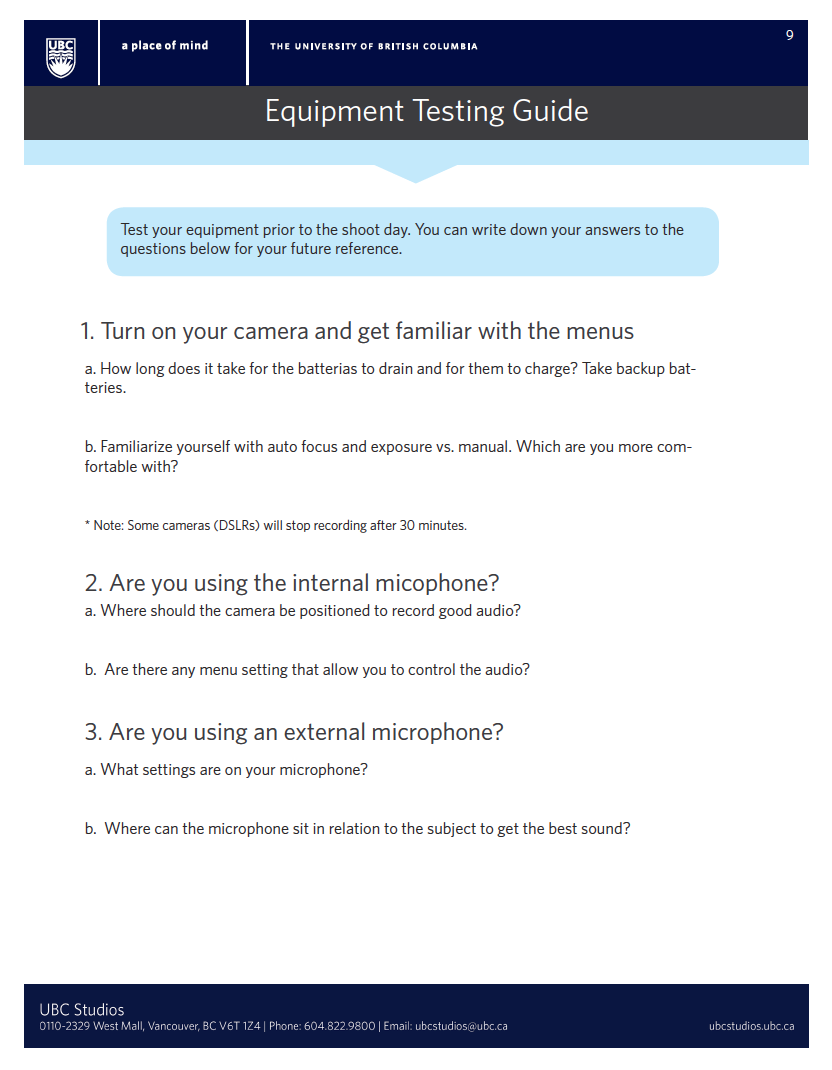
1. Test Equipment
- Before you go out and film, it's a good idea to test your equipment. Make sure all of the batteries are charged, you have enough memory space and materials are safe to travel. Check out our equipment testing guide for more guidance.
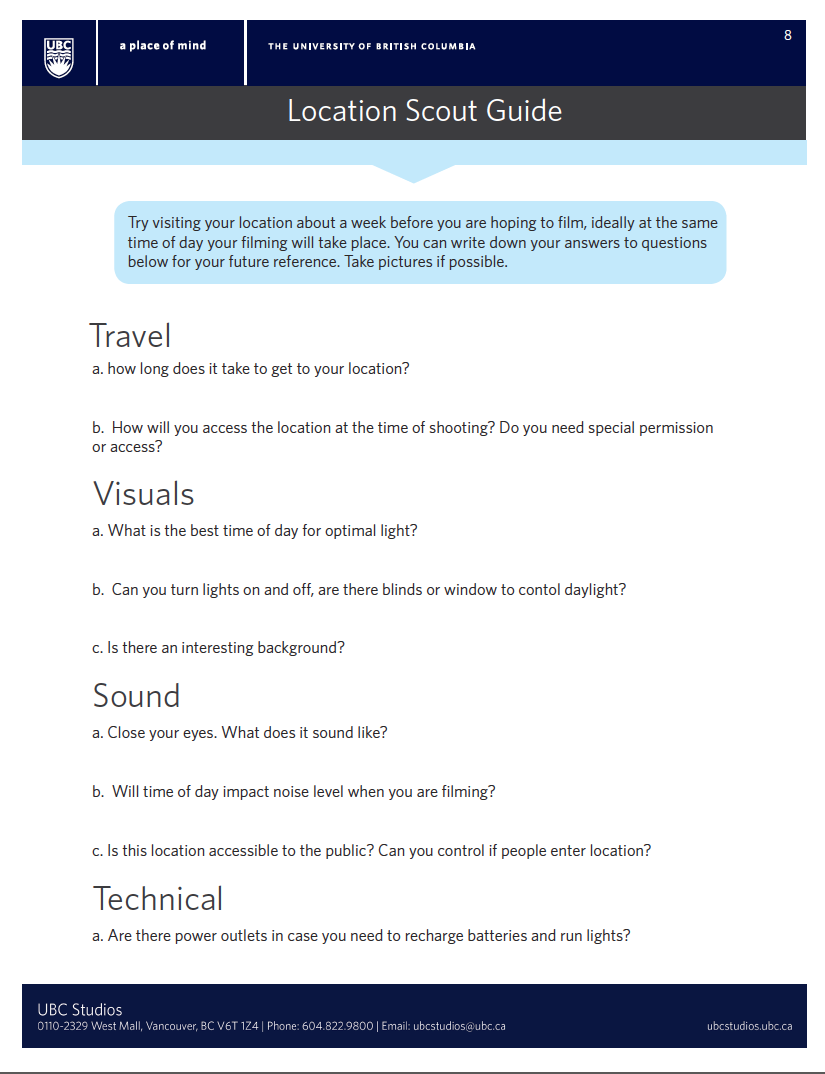
2. Location Assessment
- On the day of filming (or better yet a few days before) go to the location of the shoot and make sure everything is satisfactory so there are no surprises. Bring a printable location scout guide with you if you are unsure what to look for.
3. Set up Lighting and Sound
- In professional productions lighting and sound is a pretty complicated process, but you don't always need fancy equipment for a polished final product. Follow these easy DIY tips to make the best of materials at hand:
-
Face the subject towards the light source.
-
Look for even lighting so there are minimal shadows on the subject(s).
-
Take advantage of natural light (windows are your friend!)
- Film in a quiet place to avoid background noise.
- Rent a good quality microphone from UBC.
-
4. Start filming!
- Once you have set everything up on set, start filming! Refer to your script and storyboard for a smooth process.
1. Manage Media
- Keeping your media organized is important once you start the editing process. Name your files so you know exactly where everything is so searching for footage later will be easy.
- If multiple people are working on the same project try and keep all your video, audio, and documents in one location (ex. folder or external hard drive) so only one person can make changes at a time.
- Always keep a backup hard drive in a safe place.
2. Develop editing knowledge and choose your software
- Decide which software you want to use to edit your footage. If you are new to editing video, iMovie or Windows Movie Maker are great choices.
- Familiarize yourself with the software. Make a few practice projects or watch tutorials online to get a feel for how to properly utilize the program.
3. Edit your project
- Start editing your footage! Keep your storyboard close by as a guide for how to fit shots together. If your project calls for some music, take a browse through some royalty free music sites to find the perfect song.
4. Set your outputs
- When you're ready to export your video, take a moment to consider your outputs. H264 is the recommended format if you want to share your project on YouTube, Vimeo, and any other web platform. Suggested resolution is 1280x720p or 1920x1080p for HD.
Resources
Tools
Camera and tripod
Wireless microphone
iMovie
Windows Movie Maker
Portable harddrive (optional)
Workflow:
Getting Started with Media Production and Editing
(Provided by Lynda.com for UBC faculty and staff)
Video Recording:
Tips for Recording Device:
Script writing for Live Action:
Filming an Interview:
Lighting:
Video Composition
Post Production Tools:
Camtasia: